Overview
This guide walks you through adding voice and video calling capabilities to your iOS application using the CometChat UI Kit.Make sure you’ve completed the Getting Started guide before proceeding.
Add the Calls SDK
You can install the CometChat Calls SDK using either CocoaPods or Swift Package Manager.- CometChatCallsSDK supports iOS 13 and above
- CometChatCallsSDK supports Swift 5.0+
Option 1: CocoaPods
Open a terminal window, navigate to your project directory, and create a Podfile:Option 2: Swift Package Manager
- Go to File → Add Packages in Xcode
- Add the CometChat Calls SDK repository:
- Select Version Rules, enter the version (e.g., 4.0.5), and click Next
Make sure you have completed the Chat UI Kit integration before adding the Calls SDK.
Verify Integration
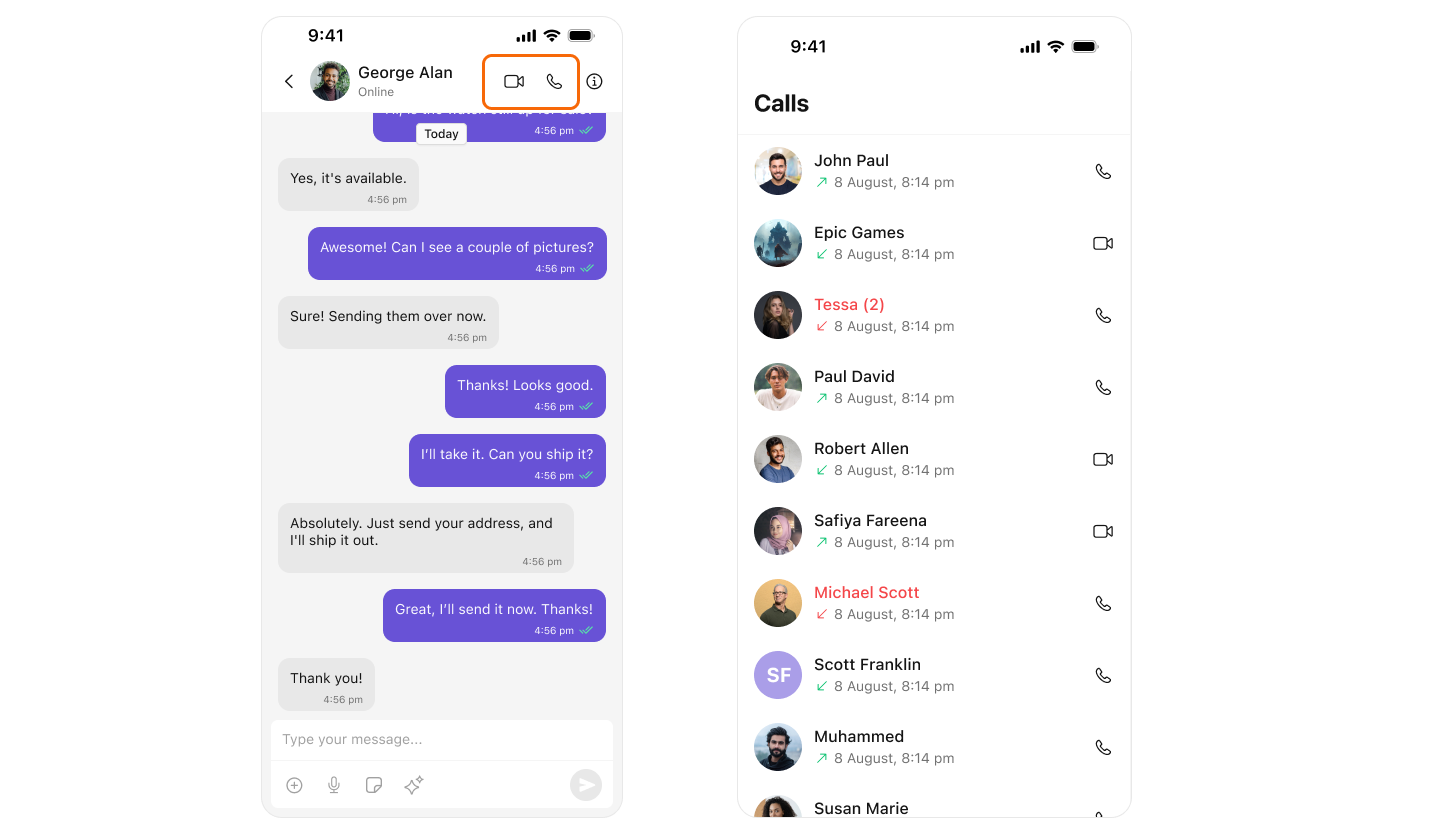
After adding the dependency, the iOS UI Kit will automatically detect it and activate calling features. You will see CallButtons rendered in the MessageHeader component.